The Transpose Wizard imports and rearranges tabular data. It can help you to analyze data generated by all kinds of multiwell plate readers, e.g. QPCR machines or spectrophotometers.
You can use the Wizard on data that is already imported into Excel; or you can open a tab-delimited text file directly from your hard drive.
The format of the data that you want to import can either be a Table or an Indexed List. Tables are often generated by absorbance/fluorescence plate readers, and indexed lists may be produced by QPCR machines.
Step 1: Source of the data
Start the Wizard from the XL Toolbox menu (Excel® 2003) or from the “Misc. data functions” menu on the Ribbon (Excel® 2007).
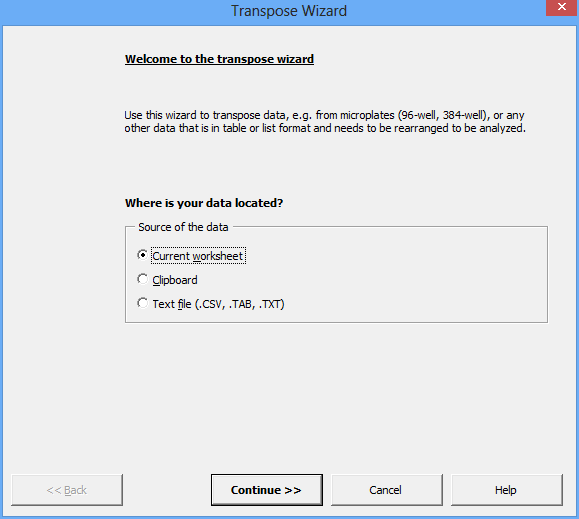
In the first step, you indicate the soure of your data. This can either be data on the worksheet that is currently visible, data in text form on the Windows® clipboard, or a tab-delimited text file.
Directly importing from the clipboard or a text file works best with indexed lists (see Step 2), because the Wizard may have more difficulty finding an unknown data table.
When you import data in table format from the clipboard or from a file, the Wizard will look for the first cell that contains the word “data”, and assume that the data table is located directly underneath it. If the data on the clipboard does not contain the word “data”, the Wizard assumes that all of the data on the clipboard has to be imported.
Step 2: Format of the data
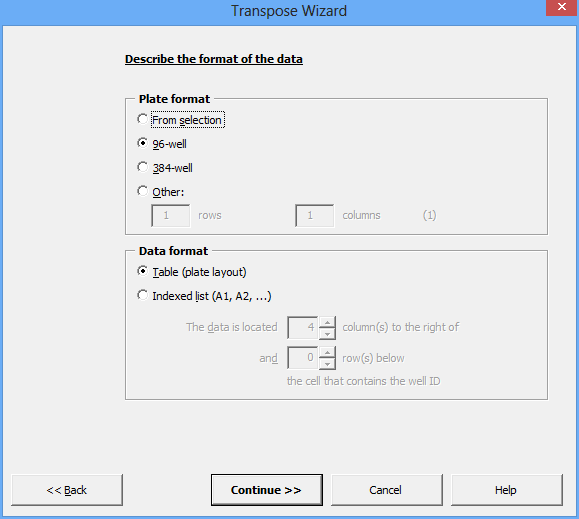
In the second step, you can describe the format of the data. If you already selected a range of cells, choose “From selection”. Otherwise, select a multiwell format, or enter your own dimensions for the plate.
Next, indicate whether your data is in table or in indexed list format:
Indexed list format
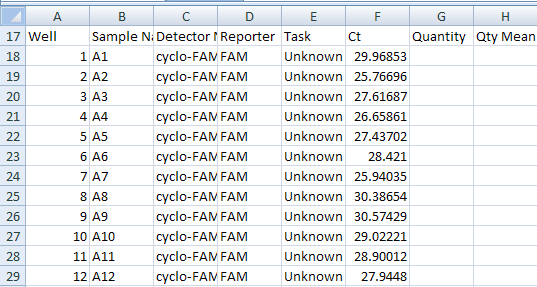
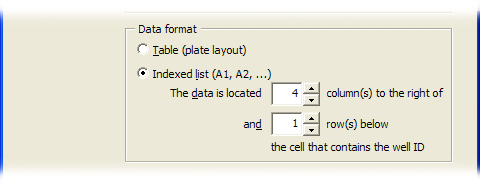
In indexed format, each well is written into an individual row. Well ID’s are given in the “A1” style (where the letter indicates the row and the number the column on the plate). Note that the data of interest (the Ct values) are located a certain number of columns to the right of the cell containing the well ID; more on that below.
Row and column offsets for list data
 When importing an indexed list, you may have to tell the Transpose
Wizard where exactly to find the data that you are interested in.
For example, in the image below, the well ID (”A1”) is
located in the selected cell, but the *Ct (dRn)* value that you want
to import is actually located *four* columns to the right and *one
row below* this identifier.

In the Wizard, you would enter these parameters as in the example below:
Step 3: Data layout
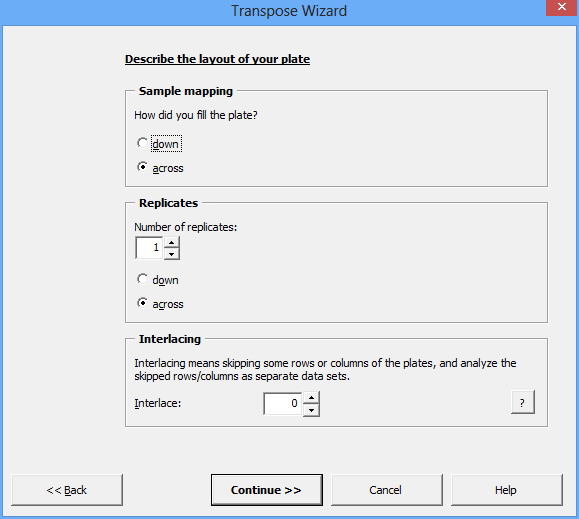
In step 3, you tell the Wizard how the data is arranged on the plate. The options are self-explanatory except for the Interlacing option.
Interlacing means that you have multiple experiments on one plate, as is common for QPCR runs. For example, you start pipetting your samples for Gene 1 into the first row of the plate; when you reach the end of the first row, you proceed with the 4th row, because you have two interlacing experiments (Genes 2 and 3) in rows 2 and 3.
Example:

Interlacing layouts are often used to facilitate pipetting of multiple samples.
Step 4: Output format
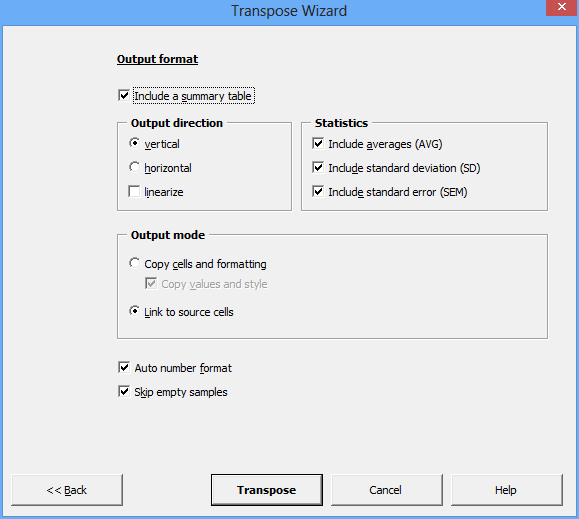
In step 4 of the Wizard, you can define your preferred output format. Many of the options are self-explanatory, but some require explanation:
- Linearize: Normally the output is in a table format, i.e. in a vertical table, the samples are written in rows, and the replicates for each sample are written in columns. You can choose however to have all data written in just one column or row, which is what “Linearize” will do.
- Auto number format: When checked, the Wizard will figure out what the optimal number format may be. Data with large numbers will be rounded, data with small numbers will have 1-3 decimal digits, and data that consists entirely of whole numbers will have no decimal digits at all.
- Skip empty samples: If you did not fill the entire plate with samples, the Wizard will produce gaps in your data table. You can eliminate these gaps by checking the “Skip empty samples” option.
 Transpose Wizard
